Choosing the right wood floor finish is more than just a cosmetic decision—it plays a crucial role in protecting your investment and enhancing the beauty of your Canton home. From high-traffic durability to subtle sheen preferences, the type of finish you select can dramatically affect the look, feel, and longevity of your floors. Whether you’re restoring existing hardwood or installing brand-new planks, understanding your options will help you make the best choice for your lifestyle and aesthetic. In this guide, we’ll break down the most popular wood floor finishes and how to pick the perfect one for your space.
The Wood Floor Finish Guide Every Canton Homeowner Needs to Read
Understanding Various Wood Floor Finish Options

Wood floor finishes protect and enhance the natural beauty of your hardwood floors. The type you choose affects durability, upkeep, and overall appearance. Below are the key finishing methods available.
Examining Oil-Based Polyurethane Wood Floor Finishes
Oil-based polyurethane is renowned for its rich warmth and amber tone. It penetrates the wood’s grain, highlighting its natural beauty and offering robust protection against scratches, spills, and wear. Ideal for older homes in Canton seeking a classic look, oil-based finishes have proven wear resistance—often lasting over 10 years under moderate traffic when properly maintained. However, be aware these finishes emit higher levels of volatile organic compounds (VOCs) and require longer drying times, typically needing three to four coats with sufficient curing between applications. This finish produces a slightly darker tone that complements traditional decors and remains a favorite for those who appreciate an antique aesthetic and long-term durability.
Reviewing Water-Based Polyurethane Wood Floor Finishes
Water-based polyurethane finishes have become popular for their eco-friendly, low-odor properties and clear finish that preserves the natural wood color. They dry rapidly, reducing project downtime, which is ideal for busy households where floors cannot be out of commission for long. Although they may not achieve the same depth of warmth as oil-based versions, they still provide substantial protection against scratches and stains. The easy cleanup with water as a solvent makes this finish a practical choice for modern, active homes, especially in areas where low emissions and rapid recovery are important.
Considering Natural Oil Wood Floor Finishes
Natural oil finishes use penetrating oils derived from sources like tung or linseed oil. These finishes enhance the wood’s natural appearance while nourishing it from within, resulting in a matte, organic look that appeals to environmentally conscious homeowners. Because natural oils seep into the wood fibers, they offer moderate resistance to moisture and minor scratches without forming a thick film. They are easy to apply and maintain—spot treatments can often be performed rather than a full recoat. Additionally, they are generally less toxic, making them a healthy option for homes prioritizing indoor air quality and organic materials.
Assessing Hardwax Oil Wood Floor Finishes
Hardwax oil finishes combine the durability of a film finish with the natural warmth of oil finishes. These finishes penetrate the wood and cure to form a protective, matte layer that is especially suited for high-traffic areas due to its excellent resistance to abrasion and chemical spills. Applied in thin layers, hardwax oil cures from the inside out for an even coat and allows for easy touch-ups without full refinishing. With low VOC levels and natural components, it is a favorite among environmentally conscious homeowners and many Canton flooring professionals who value its balance of durability and ease of maintenance.
Looking at Traditional Wax Wood Floor Finishes
Traditional wax finishes offer a time-tested method that enhances the deep character and patina of wood floors. Waxing highlights the wood grain while providing a protective layer against dust and moisture. However, wax finishes require more frequent upkeep, including periodic reapplication and buffing, to maintain their luster. They perform best in lower-traffic areas or in homes where a vintage look is desired, despite being less optimal in extreme conditions like high humidity or heavy foot traffic. Their maintenance simplicity using common household products makes them attractive for those favoring a classic, natural appearance.
Choosing the Best Wood Floor Finish for Your Canton Property

Selecting the best wood floor finish for your home involves examining factors like household traffic, durability, aesthetic preferences, and local climate. Each finish option has unique attributes that make it better suited to certain conditions or styles.
Matching Your Wood Floor Finish to Canton Household Traffic
High-traffic areas demand finishes that resist wear and tear. Oil-based polyurethane and hardwax oil finishes are well suited for busy spaces, as they offer strong protection against spills and abrasion. For rooms with less use, such as accent areas or formal rooms, natural oil finishes can beautifully display the wood’s natural grain and color while offering sufficient protection. Assess which areas in your home face heavy use to decide the optimum finish that balances durability with aesthetic appeal.
Aligning Wood Floor Finish Durability With Canton Living
Canton’s climate, subject to seasonal humidity and temperature variations, requires finishes that can withstand moisture and weather extremes. Water-based polyurethane and hardwax oil finishes have proven resistant to these factors. Finishes like oil-based polyurethane, applied in multiple coats, provide excellent durability albeit with longer application and curing times. Durable finishes reduce the need for frequent reapplications and ultimately save on long-term maintenance costs, ensuring your wood flooring remains attractive amid Canton’s variable conditions.
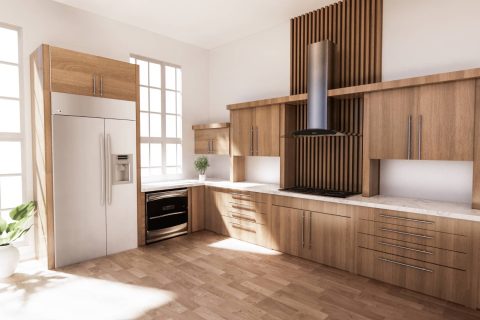
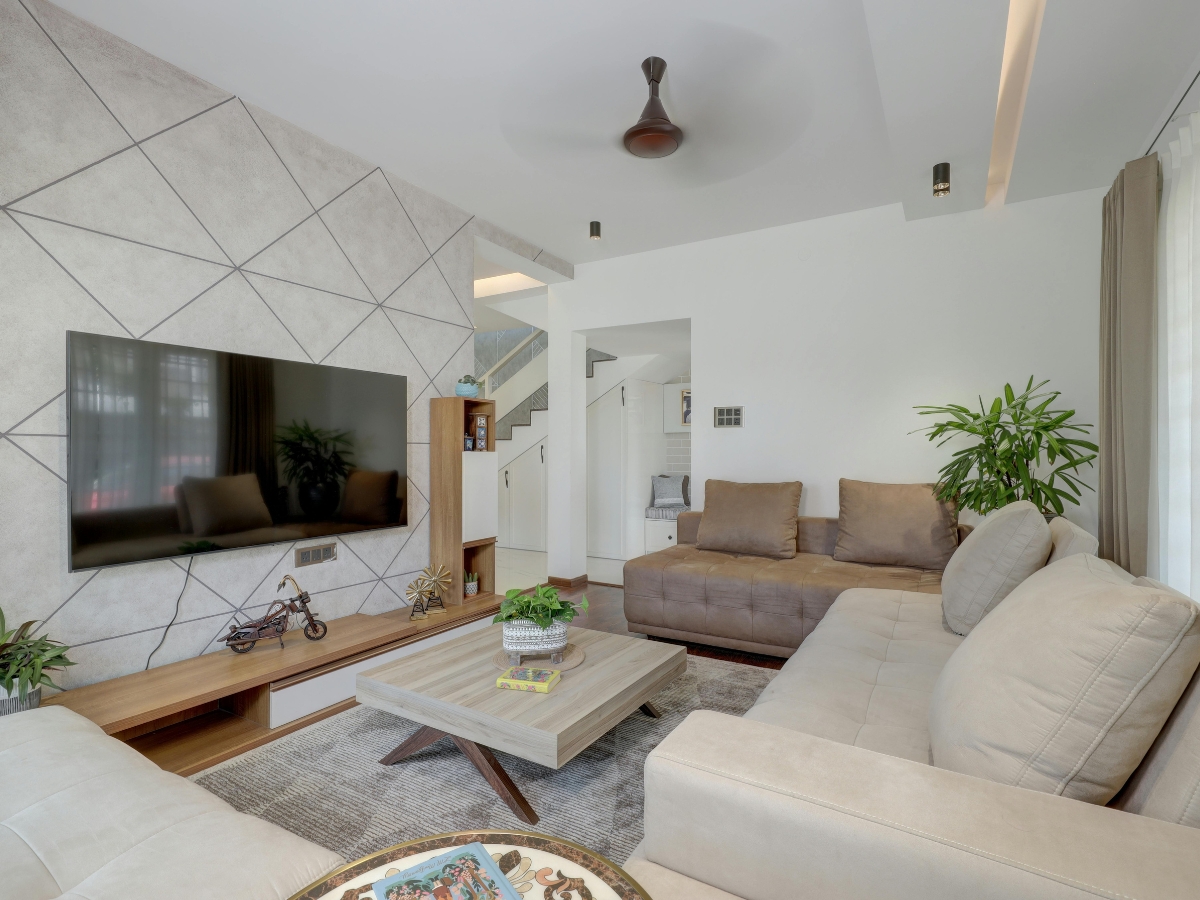
Selecting a Wood Floor Finish Sheen for Your Home’s Style
The sheen of your floor finish greatly impacts the room’s atmosphere. High-gloss finishes create a vibrant, modern look with a bright, reflective surface, while satin or matte finishes offer understated elegance suited to traditional or rustic decors. Consider your home’s style—whether modern minimalist or classic traditional—and the practical aspects, such as a matte finish’s ability to hide minor scratches. Many finishes now offer adjustable sheen levels, giving homeowners flexibility based on their personal taste and functional needs.
Factoring Canton’s Climate in Your Wood Floor Finish Selection
Due to Canton’s seasonal weather variations, selecting a finish that accommodates changes in humidity and temperature is vital. In summer, high humidity can affect the curing process, whereas cold, dry winters may make some finishes brittle. Finishes that provide strong moisture resistance and flexibility—such as water-based polyurethane and hardwax oils—are ideal choices. Prioritize products that allow for the natural expansion and contraction of wood, maintaining protection without cracking over time.
Budget Considerations for Different Wood Floor Finishes
Cost is always a significant factor. Oil-based finishes often have higher upfront costs and longer maintenance intervals, while natural oil finishes and some water-based products might cost less initially but require more frequent touch-ups. Professional installation fees also vary with the complexity of the finish applied. Weigh both initial costs and long-term expenses, including repair and refinishing, to choose a solution that meets both your budget and performance expectations. Reviewing industry pricing and contractor estimates can help ensure a product that fits your financial and aesthetic requirements.
Preparing Canton Wood Floors for a New Finish Application

If you want your wood floors to look great and last, surface prep is non-negotiable. Even the highest-quality finish won’t hold up if it’s applied to floors that haven’t been properly stripped, sanded, cleaned, and repaired. Whether you’re refreshing your home for resale or just updating worn-out floors, giving attention to each prep step will make a noticeable difference in the end result. Here’s what Canton homeowners need to know before applying a new finish to hardwood flooring.
Step 1: Remove the Existing Finish Completely
Start by removing the current finish. Skipping this step or rushing through it often leads to poor adhesion and an uneven final look. You can go about this in two ways: chemical stripping or mechanical sanding. Each method has its pros and cons, so it’s worth testing a small section before committing.
If you choose a chemical stripper, make sure the room is well-ventilated and wear protective gloves and eyewear. Chemical removers can be effective for stubborn finishes, but they require proper handling and cleanup. If you’d rather avoid chemical use, sanding is a reliable alternative. It’s more labor-intensive but provides full control over the process and eliminates the risk of chemical residue affecting your new finish.
Whatever route you take, the goal is to completely remove the existing coat so you’re starting with bare, clean wood. Partial removal often leads to uneven absorption or discoloration once the new finish goes on.
Step 2: Sand the Surface for Better Finish Bonding
Once the old finish is gone, sanding is next. This step does more than smooth out the surface; it opens up the grain of the wood, which helps the new finish bond effectively. Begin with coarse-grit sandpaper to strip away surface imperfections and any lingering finish. Work gradually up to finer grits to smooth out sanding marks and prep the surface for staining or sealing. Be thorough, especially at the edges and along baseboards. Using a dust extraction system while sanding is a smart move. It keeps the worksite cleaner and reduces the risk of fine dust particles settling into the finish later. Aim for consistent pressure while sanding to avoid gouging the floor or creating uneven spots.
Step 3: Clean the Floor Thoroughly Before Finishing
After sanding, the floor needs to be completely clean. Vacuum the surface carefully to remove all dust and sanding residue. Tack cloths are helpful for catching fine particles that vacuums might miss, especially in corners and tight areas. A light pass with a damp mop and a pH-neutral cleaner can help remove any remaining debris. Avoid oversaturating the floor with water—just enough to lift what the vacuum and tack cloths didn’t catch. Let the floor dry completely before moving on. Any leftover dust or moisture can interfere with how the new finish bonds and dries.
Step 4: Make Necessary Repairs
Once your floor is clean and bare, it’s easier to see flaws like scratches, dents, or gaps between boards. Before applying any new finish, fix these issues. Small cracks and holes can often be filled with wood putty or filler that matches the floor color. Deeper gouges or warped boards may require more extensive repair, possibly even replacement. Make sure any filler you use is fully cured and sanded flush with the floor before proceeding. Applying a finish over uncured filler or uneven surfaces will result in noticeable imperfections.
Step 5: Control the Room Environment
The conditions inside the room matter just as much as the prep work. Temperature and humidity levels can affect how the finish dries, cures, and holds up over time. Wood expands and contracts with moisture changes, so it’s important to make sure the room is stable before and after application.
Ideally, the room should be at a consistent temperature and moderate humidity level as recommended by the product you’re using. In Canton, this often means using fans or dehumidifiers to keep moisture levels in check—especially during summer or winter extremes.
Avoid applying finish during very humid or very dry days, as this can lead to problems like bubbling, cracking, or hazy spots. Follow the finish manufacturer’s instructions closely and give the floor plenty of time to dry before walking on it or placing furniture back in the room.
Applying Your Selected Wood Floor Finish Effectively

Applying a wood floor finish isn’t just about making your floors look good—it’s also about protecting them from everyday wear and moisture damage. A good finish can bring out the beauty of the wood and add years to its lifespan, but only if it’s applied correctly. Cutting corners or rushing through the steps often leads to uneven results, surface defects, or early peeling. With careful planning and the right techniques, you can achieve a smooth, even coat that holds up over time.
Here’s what to keep in mind when applying a new finish to your wood floors.
Start With the Right Supplies
Before you get to work, make sure you have everything you’ll need. This helps avoid delays and mistakes once the finish is open and in use. Gather high-quality brushes or applicators designed specifically for wood finishes. Foam or synthetic rollers can also work well, especially for water-based finishes, but avoid using low-quality tools, as they tend to shed bristles or leave streaks.
Have plenty of lint-free cloths on hand for cleanup and touchups. You’ll also need fine-grit sandpaper if you plan to lightly sand between coats. Drop cloths and painter’s tape will help protect your baseboards, vents, and adjacent surfaces.
Don’t forget safety gear. Gloves, safety goggles, and a respirator are essential, especially if you’re using oil-based products that release strong fumes.
Apply Thin, Even Coats With the Grain
When it’s time to apply the finish, the most important rule is to work in thin, even layers. Thick coats may look good at first but are more likely to dry unevenly or show brush marks. They also take longer to cure and are more prone to damage.
Always apply the finish in the direction of the wood grain, which helps with appearance and absorption. Use long, smooth strokes and overlap each pass slightly to ensure full coverage. Once applied, you can “back roll” the surface—this means going over the wet area again with a roller to smooth out brush strokes and even the surface before it starts to dry.
Avoid stopping in the middle of a section, and don’t go back over areas that have started to set. Doing so can create streaks or dull spots that will be noticeable once the floor dries.
Respect Drying and Curing Times
Drying time is just as important as the application itself. Follow the drying time listed on your product label, and don’t rush between coats. Trying to recoat too soon can leave the surface sticky and prevent proper bonding between layers.
In Canton, local humidity and temperature changes may affect how long the finish takes to dry. If it’s very humid, the floor may take longer to cure. Using fans or dehumidifiers can help maintain ideal conditions. Just avoid blowing dust or debris onto freshly finished floors.
Each coat should feel dry to the touch and show no signs of tackiness before moving on. Some finishes also benefit from light sanding between coats. This creates a smoother finish and helps the next layer adhere properly.
Aim for a Consistent Finish Across the Floor
Even application across the entire surface is key to getting a professional look. Pay close attention when blending areas where two sections meet, especially if you’re working in shifts or across multiple days.
Try to work in sections that allow you to maintain a “wet edge”—this helps avoid visible seams and patchy areas. Keeping the same type and brand of finish throughout the project also reduces the risk of inconsistent sheen or texture. Mixing brands or using different batches can lead to slight variations in color or gloss that become noticeable once everything dries.
Don’t Skip Basic Safety Precautions
Wood finishes contain chemicals that can irritate the skin, eyes, or lungs, particularly when used in enclosed spaces. Proper ventilation is essential. Open windows and doors whenever possible, and use exhaust fans to keep air moving.
Wear gloves to protect your hands and use a respirator that’s rated for vapors if you’re applying oil-based or solvent-heavy finishes. Safety goggles will protect your eyes from splashes or dust if you’re sanding between coats.
When the job is done, dispose of rags and applicators according to local guidelines. Some oil-based products can self-ignite if rags are left in a pile, so store them in a sealed metal container or follow disposal instructions on the product label.
Maintaining Your Canton Home’s Wood Floor Finish

Wood floors are a big investment, and keeping them in good shape requires regular attention. With consistent care, your floors can last for decades while maintaining their original look. Whether you’ve just had your floors refinished or are looking to extend the life of an existing finish, the right maintenance practices can make all the difference. Here’s how to keep your wood floors looking their best in everyday use, and how to spot signs that it may be time for a touch-up or full refinish.
Keep Up With Daily and Weekly Cleaning
Dust, dirt, and grit are some of the biggest enemies of a wood floor finish. Over time, even small particles can act like sandpaper, wearing down the surface and dulling the shine. To avoid this, sweep or vacuum regularly using a soft-bristle broom or a vacuum with a hard floor attachment. Avoid vacuums with beater bars, as they can scratch the finish.
Once or twice a week, follow up with a light cleaning using a damp (not wet) mop. Stick with a pH-neutral wood floor cleaner designed for your type of finish. Avoid harsh detergents or all-purpose cleaners, which can strip away the protective layer or leave behind a sticky residue. Place doormats at entryways to cut down on tracked-in dirt, and encourage people to remove their shoes indoors, especially during rainy or muddy seasons.
Prevent Scratches and Surface Damage
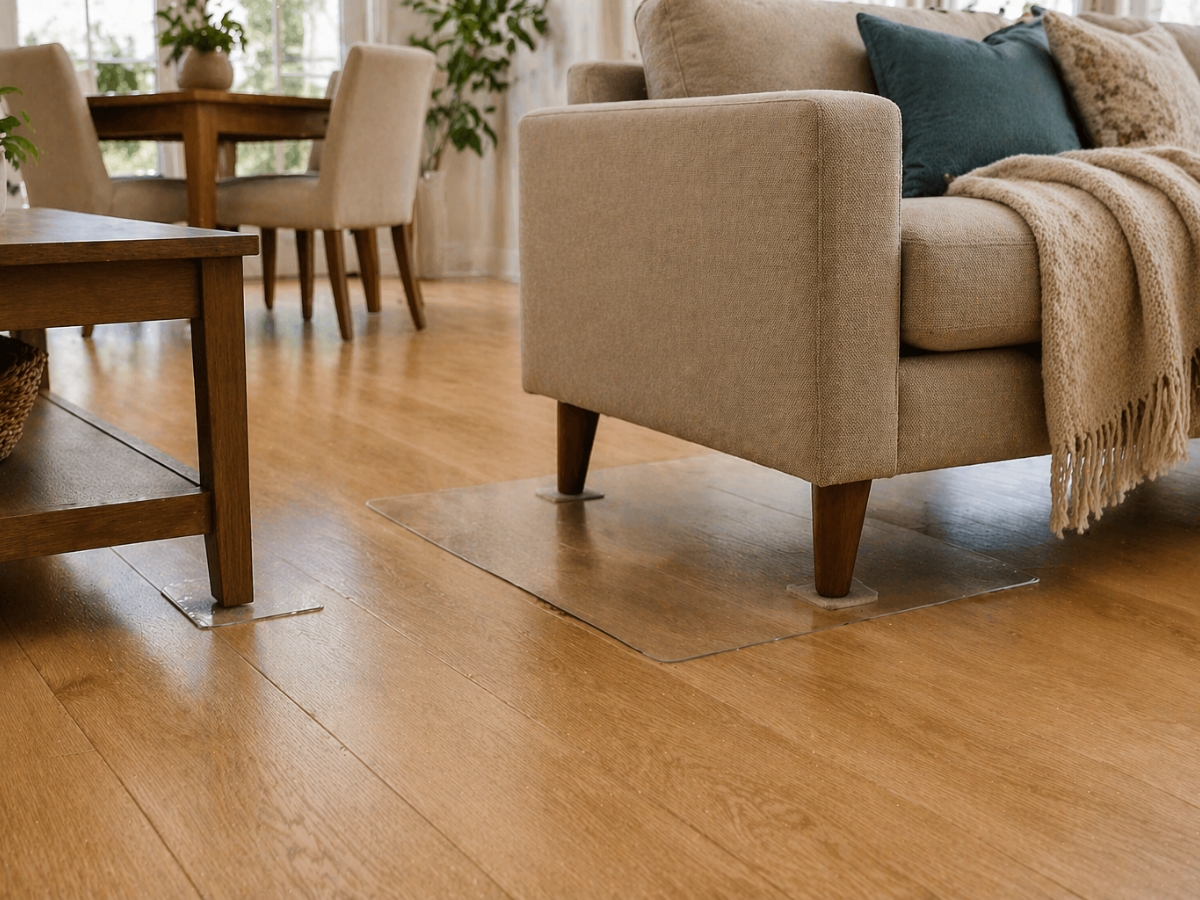
Protecting the finish is easier than trying to repair it. Add felt pads to the bottom of chairs, tables, and other furniture that gets moved around frequently. For heavier pieces, consider using wider floor protectors or rugs underneath to distribute the weight and reduce pressure on the finish.
In high-traffic areas like hallways or near kitchen sinks, use runners or area rugs. Just be sure they have non-slip backings that won’t leave marks or cause wear of their own. Rotate rugs occasionally to avoid uneven fading from sunlight. Spills should be cleaned up right away using a dry or slightly damp cloth. Letting water or other liquids sit can cause staining or warping, especially around seams or cracks.
Adjust Cleaning Methods Based on Your Finish Type
Not all finishes are the same, and how you clean your floors depends on what was applied. If your floors were finished with an oil-based polyurethane, stick with cleaners that are specifically labeled safe for oil finishes. These help preserve the layer without weakening it.
If you have a water-based finish, you’ll want to avoid strong or abrasive products, as these can cloud the surface. Look for cleaners designed for low-residue results, and don’t oversaturate the floor during cleaning. For floors treated with natural oils or waxes, the care process is a little different. These finishes tend to be more vulnerable to wear in high-use spots and may require periodic reapplication. Spot treatments can help with small marks, but plan on occasional buffing or re-waxing to keep the floor protected.
Deal With Scuffs and Scratches Promptly
Even with the best care, scratches happen. The good news is that small marks can often be handled without a full refinishing job. For light scuffs, try using a floor restorer product or a cleaner with a mild polishing effect. A matching touch-up pen or wood stain can also help hide surface blemishes. For deeper scratches or small damaged spots, you may need to lightly sand the area and reapply finish to blend it in. Make sure to test any repair method in a discreet area before committing to a more visible part of the floor.
Recognizing When to Refinish Your Canton Wood Floors
Over time, every wood floor finish will start to wear down. Signs like a dull appearance, worn spots, or areas where water soaks in quickly are clues that the finish is no longer providing full protection. If the damage is limited to certain areas, a screen-and-recoat (light sanding and a fresh topcoat) may be enough. But if you’re seeing widespread wear, deep scratches, or discoloration, it might be time for a full refinishing. This involves sanding down to the bare wood and applying a completely new finish.
How often you need to refinish depends on foot traffic, pets, cleaning habits, and environmental factors. In most homes, a well-maintained floor can go 7 to 10 years before a full refinish is needed, though some may require attention sooner.
Finding Professional Wood Floor Finish Services in Canton

Refinishing hardwood floors takes more than just the right tools—it requires skill, patience, and experience. While some homeowners may be tempted to try a DIY approach, wood floor finishing is one of those jobs where hiring a professional can make a big difference. When done right, a professionally finished floor adds value to your home and lasts for years with minimal maintenance. If you live in Canton and are considering bringing in a contractor, here are the key steps to finding someone qualified and reliable.
Identifying Experienced Canton Wood Floor Finishers
Start by looking for contractors who have a solid track record in Canton or the surrounding area. Local experience matters because different regions come with their own climate conditions, which can affect how finishes cure and how flooring materials behave over time. Contractors who are familiar with Canton’s humidity levels and seasonal changes will be better equipped to select the right products and adjust their process accordingly.
Check for a well-established business history, ideally with several years in the flooring industry. Look for companies that can show you examples of completed work. Photos of past jobs can give you a sense of the quality they deliver, and whether their work aligns with your expectations.
Use Reviews and Referrals to Narrow Your Options
Online reviews are a good place to start. Look for consistent feedback across multiple platforms, not just one or two glowing reviews on a single website. Sites like Google, Yelp, and Angi often provide insight into a company’s professionalism, punctuality, communication, and quality of work.
Personal referrals are even better. Ask friends, neighbors, or coworkers if they’ve had wood floor finishing done recently. If someone you trust had a good experience, it’s worth following up.
What to Ask a Wood Floor Finishing Professional
Once you’ve identified a few potential contractors, set up phone calls or in-person consultations to learn more about how they work. Don’t be afraid to ask specific questions about their process. For example:
- What products do you use, and why?
- How many coats of finish are typically applied?
- Do you use oil-based or water-based finishes?
- What kind of ventilation and dust control do you use?
- How long will the project take, including curing time?
Also, ask about how they handle unexpected issues. If the floor has water damage or needs repairs before finishing, how do they address it? Ask if they include cleanup as part of the job, and whether they offer any follow-up services such as maintenance advice or inspections.
Evaluating Estimates for Wood Floor Finishing Work
Always ask for written estimates, and don’t rely on verbal quotes. The estimate should outline all costs, including materials, labor, sanding, finish application, and any extras like floor repairs or furniture moving. Compare estimates from at least two or three contractors, but don’t automatically go with the lowest price. A much lower quote may indicate shortcuts in the process or the use of cheaper materials. Focus instead on value—what’s included, the timeline, the experience of the team, and whether the company has a reputation for standing behind its work.
Checking References for Canton Wood Floor Finish Specialists
Any contractor worth hiring should be able to provide references. Ask for contacts from recent projects and follow up with them. When speaking to references, ask how the floors have held up over time, whether the crew stayed on schedule, and if they encountered any issues during or after the project. It’s a good idea to ask if they would hire the same contractor again. That one question can often tell you everything you need to know.
Understanding Warranties on Wood Floor Finish Applications
Before signing any agreement, make sure you understand the warranty offered. A reputable contractor should stand behind both the materials and the workmanship. Warranties may cover issues like peeling, bubbling, or premature wear, but they may not cover damage from furniture, pet nails, or water exposure. Review the fine print and clarify how long the coverage lasts, what is included, and what could void the warranty. If the company doesn’t offer any type of guarantee, that may be a red flag.
Frequently Asked Questions
Q: How do I determine if my wood floors need refinishing? A: Look for signs such as dullness, deep scratches, visible water damage, or an uneven sheen. Regular inspections and professional consultations can help determine if refinishing is necessary.
Q: Can I apply a new finish over the existing one? A: While occasional re-coating is possible, it is best to remove the old finish and properly prepare the wood to ensure optimal adhesion and longevity, especially in high-traffic areas.
Q: Is water-based polyurethane a better option for Canton homes? A: Many homeowners prefer water-based polyurethane for its fast drying times, low odor, and clear finish. However, the final choice depends on your specific traffic, environmental, and aesthetic needs.
Q: What maintenance routine should I follow for my newly finished floors? A: Regularly dust or vacuum with a proper attachment, use a mildly damp mop for cleaning, and place protective mats in high-traffic areas. Proceed with touch-ups as needed.
Q: How long does the refinishing process typically take? A: Refinishing generally takes several days to a week, including preparation, multiple finish coats, and proper drying time between applications.
Q: Are natural oil finishes safe for pets and children? A: Yes, natural oil finishes are typically more environmentally friendly with lower VOC emissions, making them safer for households with children and pets. Always ensure proper ventilation during application.
Q: When should I consider professional help versus a DIY approach for wood floor refinishing? A: While minor touch-ups can be a DIY project, larger or high-traffic area refinishing is best handled by professionals to ensure a quality, long-lasting finish.
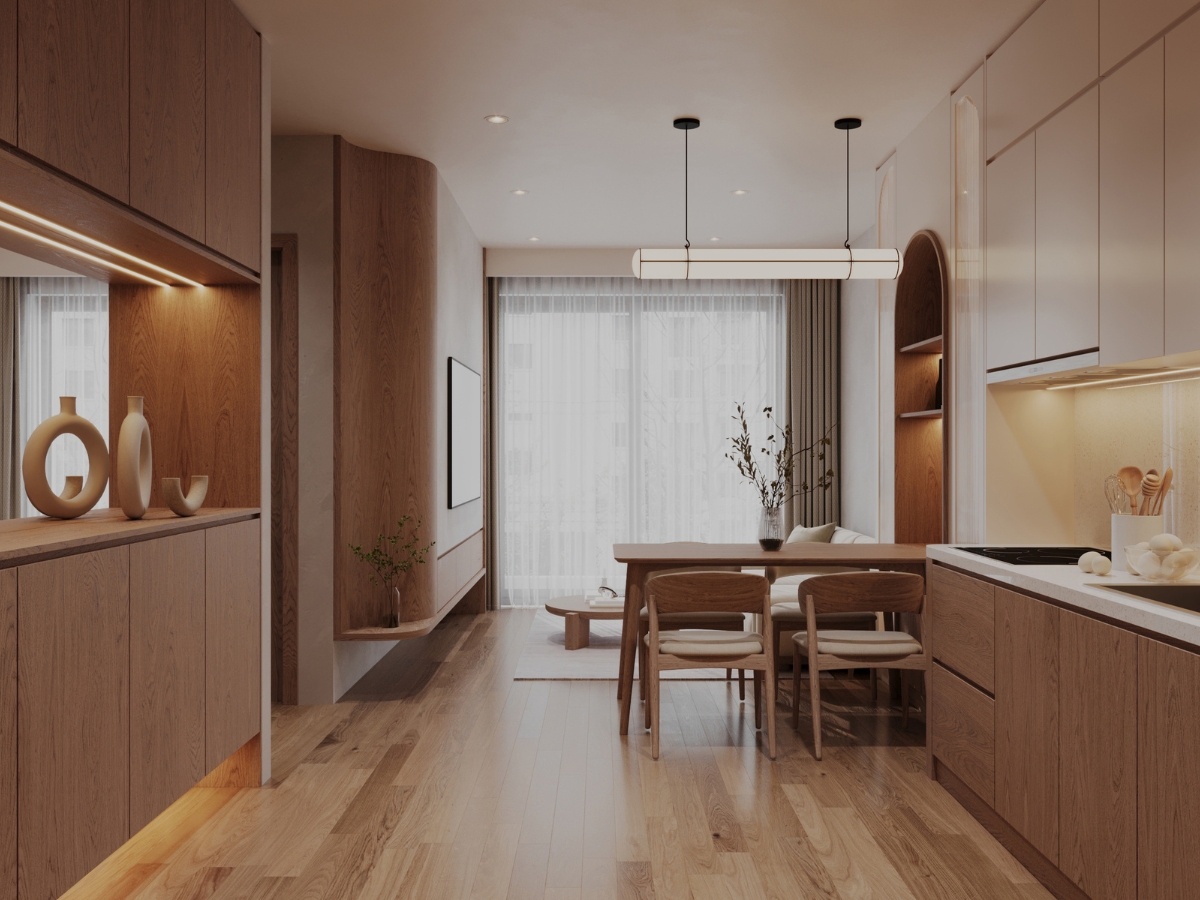
Choosing the Perfect Wood Floor Finish for Your Canton Home
Choosing the right finish for your wood floors can protect your investment, highlight natural grain patterns, and ensure lasting beauty in your Canton home. Whether you prefer the rich warmth of oil-based finishes or the quick-drying convenience of water-based options, Diaz Hardwood Floors has the hardwood flooring expertise to guide you to the perfect choice. Call us at 404-791-0444 or send us a message to discuss your flooring needs and schedule a consultation—let us help you achieve floors that look stunning and stand up to daily life for years to come.