Have you been dreaming of transforming your home with the luxurious beauty of hardwood flooring? If so, you’re not alone. Many homeowners are drawn to the timeless elegance and durability that hardwood floors offer.
However, embarking on a hardwood flooring installation project can be a daunting task if you’re not properly prepared. From selecting the right type of hardwood to ensuring proper subfloor preparation, there are several crucial steps to take before diving into the installation process.
In this blog post, we will guide you through the top tips for preparing to install hardwood flooring, ensuring that your project is a success from start to finish. So, let’s roll up our sleeves and dive into the world of hardwood flooring installation, where your dream home awaits.
Install Hardwood Flooring: The Ultimate Guide to Transforming Your Space!
Accurately Measuring Your Space

When it comes to installing hardwood flooring, one of the most important factors to consider is accurately measuring your space. Proper measurements are crucial for ensuring that you have enough materials and that the installation process goes smoothly. Here are some tips to help you accurately measure your space before installing hardwood flooring.
When it comes to installing hardwood flooring, one of the most important factors to consider is accurately measuring your space. Proper measurements are crucial for ensuring that you have enough materials and that the installation process goes smoothly. Here are some tips to help you accurately measure your space before installing hardwood flooring.
- Start by measuring the length and width of each room where you plan to install hardwood flooring. Use a tape measure and measure from wall to wall, making sure to account for any alcoves or nooks. Write down these measurements for each room.
- Once you have the length and width measurements, multiply them together to calculate the square footage of each room. This is an important step to ensure that your hardwood floors are accurately installed.
- If your room has any odd angles or areas that are not rectangular, break them down into smaller, more manageable shapes. Measure each section separately and then add the square footage together to get the total square footage for that room.
- It’s important to remember that you should always order more materials than you think you’ll need. This accounts for any mistakes or cuts that may need to be made during installation. It’s recommended to order an additional 10-15% of hardwood flooring to ensure you have enough.
- Don’t forget to account for any closets, hallways, or other smaller areas that also require flooring. Measure these areas separately and add the square footage to your overall total.
- If you are planning to install hardwood flooring in multiple rooms, calculate the square footage for each room individually and then add them together to get the total square footage for the entire project. Accurately measuring your space is essential for a successful hardwood flooring installation.
Acclimating the Hardwood Planks

Before you embark on the journey of installing hardwood flooring, it is essential to understand the importance of acclimating the hardwood planks. Acclimation refers to the process of allowing the wood to adjust to its new environment before installation. This step is crucial to ensure the long-term stability and durability of your hardwood floor.
When hardwood planks are manufactured, they undergo a drying process to reduce their moisture content. However, the wood still retains a certain level of moisture. By acclimating the planks, you are allowing them to adapt to the humidity and temperature conditions of the space where they will be installed.
To acclimate hardwood planks, follow these top tips:
- Timing is key: Start the acclimation process at least 48 hours before the installation. This timeframe allows the wood to slowly adjust to the surroundings. Avoid rushing this step, as it can lead to issues such as warping or buckling of the planks.
- Assess the environment: Measure the humidity and temperature levels of the room where the hardwood flooring will be installed. Use a hygrometer to accurately determine the moisture content in the air. Ideal conditions for acclimation usually range between 40% and 60% humidity.
- Open the packaging: Remove the hardwood planks from their packaging, but keep them strapped together. This will allow air circulation around the planks, promoting a more consistent acclimation process.
- Stack the planks properly: Create neat stacks of hardwood planks, with spacers placed between each layer. This spacing allows for air movement, ensuring that each plank is exposed to the surrounding environment. Avoid placing the stacks directly on the floor, as this can interfere with the acclimation process.
- Monitor the acclimation progress: Regularly check the moisture content of the hardwood planks during the acclimation period. Use a moisture meter to measure the moisture levels and ensure they align with the acceptable range for the specific type of wood being installed.
- Be mindful of extreme conditions: Avoid acclimating the hardwood planks in an area that experiences excessive moisture, such as a bathroom or laundry room. Similarly, keep the planks away from direct sunlight or areas with extreme temperature fluctuations.
By properly acclimating your hardwood planks, you are setting the stage for a successful and long-lasting installation. This crucial step minimizes the risk of issues such as cupping, crowning, or gaps between the planks. Take the time to allow the wood to adjust, and you will be rewarded with a beautiful and stable hardwood floor for years to come.
Inspecting and Preparing the Subfloor

When it comes to installing hardwood flooring, one of the most important steps is inspecting and preparing the subfloor. This crucial process sets the foundation for a successful installation and ensures that your hardwood flooring will look beautiful and last for years to come.
Before you begin the installation process, it’s essential to thoroughly inspect your subfloor. This involves checking for any signs of damage or moisture issues. Start by walking around the room and feeling for any soft or uneven areas. These could indicate a problem with the subfloor that needs to be addressed before proceeding.
Next, examine the subfloor for any visible signs of moisture or water damage. Look for discoloration, warping, or mold growth. Moisture can cause serious problems for hardwood flooring, so it’s crucial to identify and resolve any issues before moving forward.
If you discover any damage or moisture problems during the inspection, it’s important to address them promptly. Repair any damaged areas of the subfloor and take steps to eliminate any moisture issues. This may involve hiring a professional to assess and repair the damage, especially if it’s extensive.
Once the subfloor inspection is complete and any necessary repairs have been made, it’s time to prepare the subfloor for hardwood installation. Start by thoroughly cleaning the subfloor, removing any debris, dust, or dirt. A clean subfloor provides a smooth surface for the hardwood flooring to adhere to properly.
Next, ensure that the subfloor is level and flat. Use a level or straightedge to check for any uneven areas. If you find any high spots, you’ll need to sand them down to create a level surface. Conversely, low spots may require the use of a leveling compound to even out the subfloor.
Finally, ensure that the subfloor is completely dry before proceeding with the hardwood installation. Moisture can damage the wood and cause it to warp or buckle over time. Use a moisture meter to test the subfloor’s moisture levels, and wait until it falls within the recommended range before moving forward.
Selecting the Right Type of Hardwood Flooring

When it comes to selecting the right type of hardwood flooring for your home, there are several factors to consider. From the type of wood to the finish and color, each decision will contribute to the overall look and feel of your space. Here are some top tips to help you make the best choice for your hardwood flooring installation project.
- Consider the Wood Species: Different wood species have distinct characteristics that affect their appearance and durability. Oak is a popular choice due to its strength and versatility, while maple offers a lighter and more modern look. Exotic woods like Brazilian cherry or teak provide a unique and luxurious feel. Research each species to find the one that suits your style and needs.
- Evaluate the Hardness: The hardness of a wood species is measured on the Janka scale. This scale determines how well the wood can withstand wear and tear. If you have a high-traffic area or pets, you may want to choose a harder wood to prevent scratches and dents. Softer woods can be susceptible to damage over time.
- Determine the Width and Length: The width and length of the hardwood planks can significantly impact the overall aesthetic of your space. Narrow planks create a traditional and elegant look, while wider planks offer a more contemporary and rustic feel. Consider the size of your room and the desired visual impact when choosing the width and length of your hardwood flooring.
- Select the Right Finish: The finish of your hardwood flooring not only enhances its appearance but also provides protection against everyday wear. There are various finishes available, including oil-based polyurethane, water-based polyurethane, and penetrating oil finishes. Each finish has its own advantages and maintenance requirements, so choose the one that aligns with your lifestyle and preferences.
- Take Color into Account: The color of your hardwood flooring can significantly affect the overall ambiance of your home. Lighter shades like blonde or honey oak can make a room feel more spacious and airy, while darker hues like walnut or mahogany create a warm and cozy atmosphere. Consider your existing furniture and décor to ensure the color of the flooring complements your overall design scheme.
Clearing the Room and Preparing the Workspace

When it comes to installing hardwood flooring, it’s important to start with a clear and organized workspace. Clearing the room and preparing the workspace beforehand will not only make the installation process smoother but also ensure a professional and polished end result.
The first step in preparing the workspace is to remove all furniture and belongings from the room. This includes chairs, tables, rugs, and any other items that may interfere with the installation process. Clearing the room will give you a clean and open area to work in, making it easier to maneuver and lay down the hardwood flooring.
Next, it’s important to thoroughly clean the room. Sweep or vacuum the floor to remove any dust, dirt, or debris that may have accumulated. This will create a clean surface for the hardwood flooring to be installed on, preventing any imperfections or bumps from forming.
If there are any existing flooring materials, such as carpet or linoleum, they will need to be removed. Use appropriate tools to carefully strip away the old flooring, making sure not to damage the subfloor underneath. Once the old flooring is removed, check the subfloor for any signs of damage or unevenness. If necessary, make any repairs or adjustments before proceeding with the installation.
Before laying down the hardwood flooring, it’s important to acclimate the wood to the room’s temperature and humidity. This can be done by leaving the flooring in the room for a few days, allowing it to adjust to the environment. This step is crucial to prevent the wood from expanding or contracting after installation.
Once the room is cleared, cleaned, and prepared, it’s time to start installing the hardwood flooring. Follow the manufacturer’s instructions and use the appropriate tools and techniques to ensure a proper installation. Take your time and pay attention to detail, as a well-installed hardwood floor can greatly enhance the aesthetics and value of a room.
Preparing for Potential Challenges

When it comes to installing hardwood flooring, it’s essential to be well-prepared for any potential challenges that may arise during the process. By taking the time to anticipate and address these challenges ahead of time, you can ensure a smoother installation experience. Here are some top tips to help you prepare for installing hardwood flooring:
- Measure and plan: Before you begin the installation, accurately measure the area where you’ll be installing the hardwood flooring. This will help you determine the amount of materials you’ll need and avoid unnecessary trips to the store. Additionally, carefully plan the layout of the flooring to optimize the aesthetic appeal and functionality of the space.
- Acclimate the wood: Hardwood flooring needs to acclimate to the environment it will be installed in. This process involves allowing the wood to adjust to the temperature and humidity of the room. Follow the manufacturer’s recommendations regarding acclimation time to prevent gaps or warping in the flooring later on.
- Prepare the subfloor: A proper subfloor is crucial for the successful installation of hardwood flooring. You want to make sure that the subfloor is clean, level, and free of any debris. If necessary, repair any imperfections or unevenness to create a smooth surface for the flooring.
- Gather the right tools: Having the right tools on hand can make the installation process much easier. Some essential tools for installing hardwood flooring include a tape measure, miter saw, nail gun, rubber mallet, and a level. Make sure all your tools are in good working condition before you start the installation.
- Follow the manufacturer’s instructions: Each hardwood flooring product may come with specific installation instructions. It’s crucial to carefully read and follow these instructions to ensure proper installation. Deviating from the manufacturer’s guidelines may void any warranties and lead to subpar results.
- Take precautions against moisture: Moisture is the enemy of hardwood flooring. Ensure that the installation area is dry and free from any water leaks or dampness. Consider using a moisture barrier, such as a vapor barrier, to protect your hardwood flooring from moisture-related issues.
- Allow for expansion and contraction: Wood naturally expands and contracts with changes in temperature and humidity. To prevent the hardwood flooring from buckling or warping, leave a small gap between the flooring and the walls. This expansion gap will allow the wood to move without causing damage.
- Consider hiring a professional: If you’re unsure about your ability to install hardwood flooring yourself, it’s always a good idea to hire a professional. They have the experience and expertise to handle any unexpected challenges that may arise during the installation process.
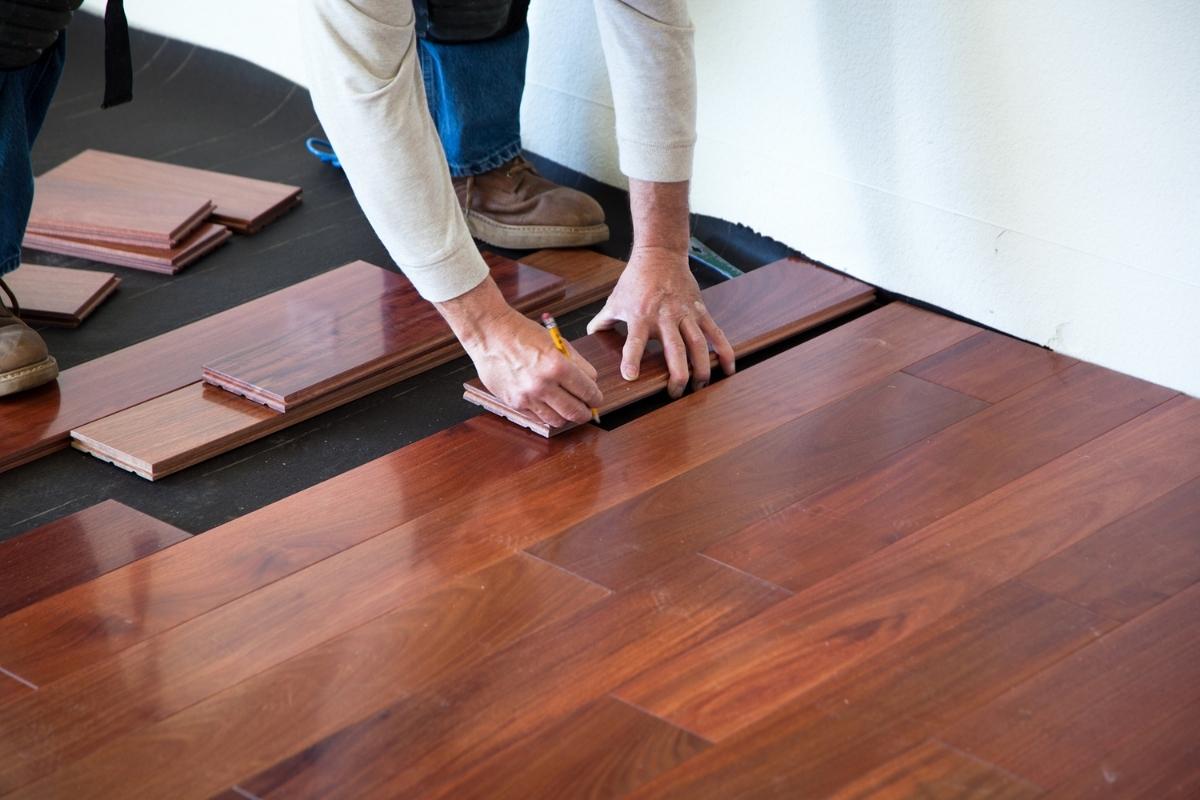
Properly Handling and Installing the Hardwood Planks

When it comes to installing hardwood planks, proper handling and installation techniques are crucial to ensure a successful and long-lasting result. Here are some top tips to help you prepare and execute the installation of hardwood flooring.
- Start with a Solid Base: Begin the installation by laying a solid base or underlayment. This helps to reduce noise, provides insulation, and creates a smooth surface for the hardwood planks. There are various types of underlayment available. Some of these can include foam, cork, and plywood. Choose the one that best suits your needs and the requirements of the hardwood flooring manufacturer.
- Follow the Manufacturer’s Instructions: Each hardwood flooring product may have specific installation instructions provided by the manufacturer. It is important to carefully read and follow these instructions to ensure a proper installation. This includes guidelines for proper spacing, nailing or stapling techniques, and any specific requirements for the type of hardwood being installed.
- Handle with Care: Hardwood planks are susceptible to damage, so it is crucial to handle them with care during the installation process. Avoid dropping or dragging the planks, as this can cause dents or scratches. Use proper lifting techniques and protective padding to prevent damage to the flooring material.
- Secure the Planks: Secure the hardwood planks to the subfloor using the recommended method, whether it be nailing, stapling, or gluing. Follow the manufacturer’s guidelines for spacing between planks and ensure a consistent and secure installation. Use a rubber mallet or tapping block to gently tap the planks into place, ensuring a tight fit.
- Allow for Expansion: Hardwood flooring naturally expands and contracts with changes in temperature and humidity. To accommodate this movement, leave a small gap between the flooring and the walls, as well as any fixed objects such as cabinets or heating vents. Use spacers to maintain the proper gap during installation.
- Finishing Touches: Once all the planks are installed, it is time to add the finishing touches. Install any necessary trim or moldings to cover the gaps and provide a polished look. Sand and finish the hardwood flooring according to your preferences, whether it be staining, oiling, or applying a protective coating. By properly handling and installing hardwood planks, you can achieve a beautiful and durable flooring solution that adds value and warmth to your space.
Conclusion: Enjoying Your Beautiful and Long-Lasting Hardwood Floor
Once you have successfully installed hardwood flooring in your home, it’s time to sit back, relax, and enjoy the beauty and durability it brings to your space.
By following these tips and implementing a regular maintenance routine, you can enjoy the beauty and durability of your hardwood floor for years to come. With proper care, your hardwood floor will continue to enhance the aesthetic appeal of your home and provide a timeless elegance that never goes out of style.
For the best results with your hardwood flooring, the best option is to work with a quality hardwood flooring company like Diaz Hardwood Floors.
Choose our trustworthy hardwood refinishing and repair services to keep your hardwood floors looking great. From installation to maintenance, our services will help ensure that your hardwood floors look great and stay that way. Request a free quote on our website or call 404-791-0444 to find out what we can do for your hardwood flooring today!